How to Setup Your Account
Step 1: Add Contacts
To start storing your Secrets, you will first need to add some Contacts. Contacts are people you add to your app who can be assigned roles such as Guardians or Trustees. These roles help manage and recover your secrets.
We recommend adding at least 3 Contacts. Please visit the Contacts, Guardians, and Trustees section of our FAQ if you’d like to understand why.
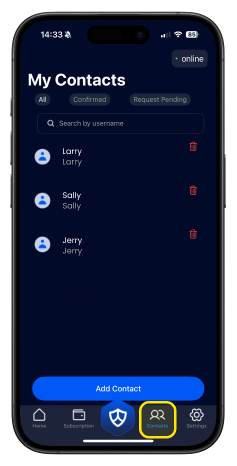
- Log into the app, then visit the “Contacts” tab depicted below. It will be the fourth tab in the bottom navigation bar.
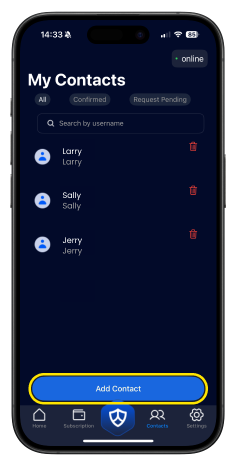
- Once you’re on the “Contacts” tab, select the “Add Contact” button found in the bottom portion of the window.
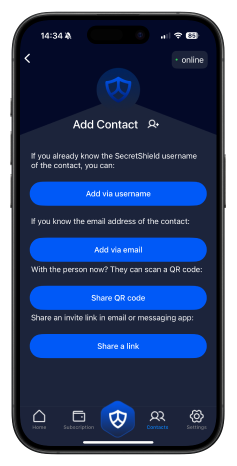
- On the Add Contact screen, select how you would like your invitation to be sent.
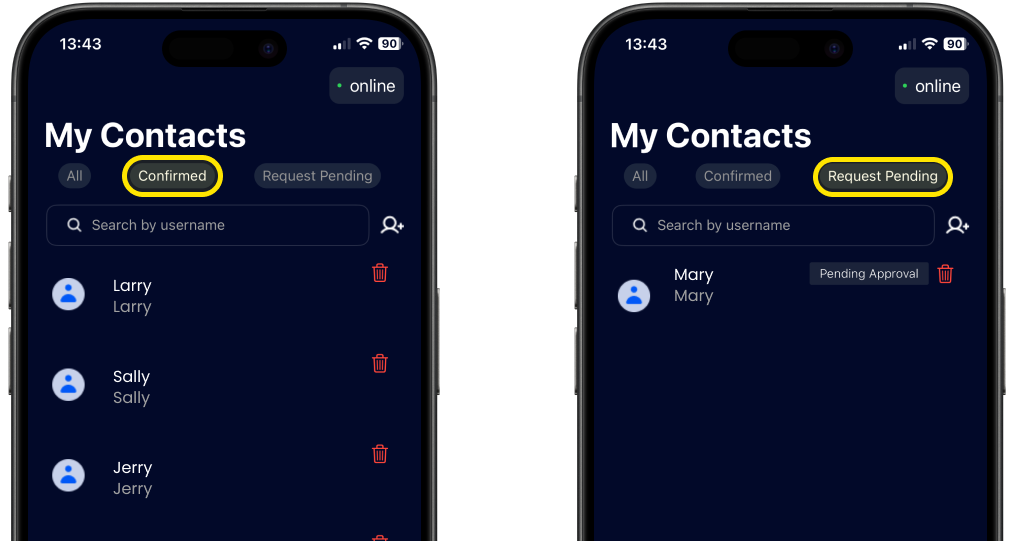
- Once you have added your Contacts, ensure they have accepted your invitation to SecretShield. To see the status of invited Contacts, visit the “Request Pending” tab. If your Contacts have accepted the invitation, you will be able to see them in the “Confirmed” tab.
Step 2: Store Your First Secret
Once you’ve added your first Contacts and ensured they’ve accepted your invitation, you’re ready to create your first Secret!
A Secret is any piece of critical, sensitive information that you want to protect and recover using SecretShield. This can include seed phrases, mnemonics, master passwords, confidential information, trade secrets, executor instructions, and small file attachments.
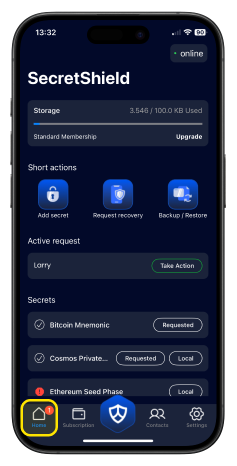
- Visit the “Home” tab within the SecretShield app.
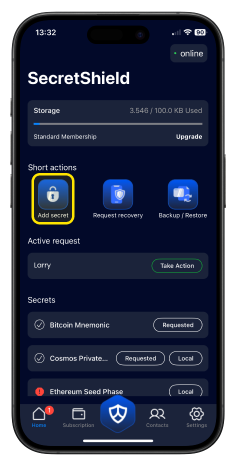
- Select “Add Secret” using the button found on the middle left hand section of the screen.
-
Read the disclaimer and select “CONTINUE”.
-
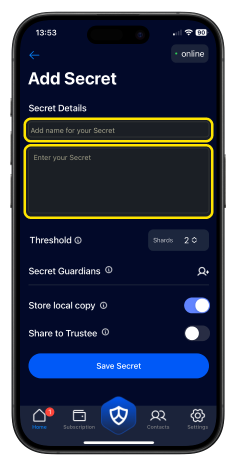
Under “Secret Details,” name your Secret, then enter or copy and paste the sensitive information you’d like to store within the app in the area that says “Enter your Secret”
Step 3: Add Guardians
A Guardian is an individual you designate to hold a "share" or "shard" of your secret data. These shares do not contain the actual secret and are only pieces of data used in the recovery process.
We recommend adding at least 3 Contacts.
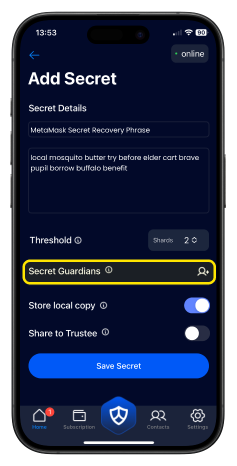
- Now, it’s time to add Guardians. Click the “+” button across from where you see “Secret Guardians”.
-
Select AT LEAST 2 Guardians you would like to assign to the Secret you just created and press “CONTINUE”.
-
Adjust the threshold for Recovery. The threshold options will dynamically update based on the number of shares selected for your Guardians.
Step 4: Assign a Trustee (Optional, Paid Users Only)
Give a Trustee the ability to recover your Secret with the help of your Guardians. Learn more about Trustees
A Trustee is a highly trusted individual, usually a loved one, who holds a subset of your secret’s configuration. They don't get a copy of the secret itself but can request recovery of the secret from your assigned Guardians.
-
Ensure you have your prospective Trustee added as a Contact
-
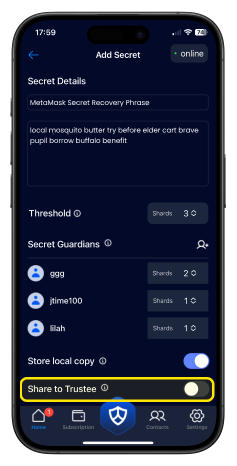
Select your Secret and turn on “Share to Trustee” using the toggle on the right-hand side of the screen.
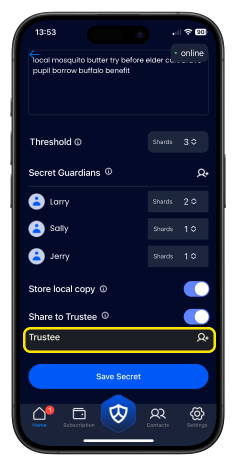
- Now, it’s time to add Trustees. Click the “+” button across from where you see “Share to Trustees”.
- Select the Contact you would like to assign as a Trustee for your Secret.
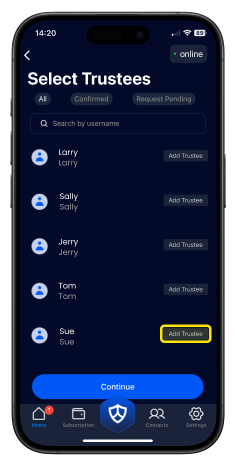
- Press “CONTINUE”
Upon saving the Secret and allowing some time for communication, have your Trustee check their SecretShield app. They should now see the Secret they’ve been assigned as a Trustee to.
Now that your Secret is configured, make sure you Create Your First Backup in case anything happens to your device.
SecretShield only stores your data on your device without a backup. This means, if your phone gets run over by a car, you cannot recover SecretShield by downloading the app on a new device. You must recover your backup to restore the configuration of your Secrets, Guardians, and Trustees.